So there is some good news, in that I actually think this adventure will work okay solo. The adventure book basically explains that you can proceed exploring the island and surrounding sea as a hexcrawl.
I’ve never done a hexcrawl, but I’ve watched some YouTubers playing solo adventures and a lot of them utilize the hexcrawl procedure to do so.
I think this will also help me obfuscate some of the events for the reader, because I can just scramble where everything is at, so as not to spoil the adventure for them. For example, the location of the wreck of the Silent Angel doesn’t have to be where the book says it is. I can roll and put it anywhere on the island. Or even on a different island.
Anyway, the adventure book says to loot the redcoats after the battle, and that’s what I did. It also says you can choose to camp on the beach that night, and if you do so, to roll an encounter, after restoring your HP from the short rest.
After that, you begin the hexcrawl of the island in any direction you see fit. There are some landmarks with descriptions and areas of interest in the book, but like I said, I can put those anywhere on the island just by rolling, which is what I’m going to do.
I decided to have them camp. They needed to take a rest anyway to restore HP, and this made sense.
There was also another reason. Bart, as you remember, is a secret zombie, and so he has to eat the dead every other day or he loses two HP. So I had him sneak away in the middle of the night to go eat the brains of the fallen redcoats (brains are a delicacy for zombies in PIRATE BORG, you literally regain more HP if you eat the brains).
But here’s the thing, Felicity’s “idiosyncrasy” at character creation is that she’s a “voluntary insomniac”.
So I had her sneak out after Bart when he steals away in the middle of the night.
Is she going to discover his secret?
I decided to make a roll and find out. 50/50 chance. Ten and under, she finds out, over ten, she doesn’t.
But either way, I decided she would have to make another roll at that time for the encounter. Ten and under, she and Bart are ambushed alone (at least for the first round), and she doesn’t actually learn his secret, or over ten and they are not ambushed until they both return to camp.
She rolls an eleven.
Bored with following Bart, she returns to camp. Bart eventually returns back later. She hears him but pretends to be asleep.
But she does hear something else, and realizes that they are about to be ambushed!
“Wake up, you miserable dogs!” she cries, springing up with her new Officer’s Cutlass in hand.
So time to roll for an encounter on the Eel Isaland encounter table. It’s D4 lost redcoats. Turns out to be only two of them.
They get to go first though.
The first one shoots at a startled Bart. But he rolls an 11 and with his +1 agility modifier he passes the DEFENSE test on the number.
The second one rushes at Felicity with his cutlass. He hits! 2HP damage.
Felicity strikes back though and hits with her Officer’s Cutlass for 3 damage.
Beltran gets up and attacks the same redcoat soldier with his finely crafted rapier. Misses. Must still be half asleep.
Bart rolls over, grabs his musket, and fires at the redcoat gunner. Misses!
Mother Isis calls for Divine Wrath. Hits the redcoat soldier for eight damage. He falls over and dies.
The gunner decides to charge in with his bayonet as opposed to reloading. So he comes after Bart. He hits! But only for 1HP damage.
Bart strikes back on the next round with his own cutlass that he pillaged earlier from the redcoat’s friends. But misses!
Felicity tries to run the redcoat through with her officer’s cutlass, and succeeds for 4 damage. The gunner is defeated.
They search the bodies and find thirty-four silver pieces, a musket with enough shot for six rounds, a bayonet, and a cutlass. They take the silver and the musket with shot but leave the rest behind.
They decide to get started exploring the island, as it’s almost daybreak, but after taking enough rest for Felicity to regain her HP.
So the hexcrawl begins. There is an included hex map of Eel Island and its surroundings. Each hex represents two miles. The party can travel four miles, or two hexes, per watch. There are six watches in a day, and you are provided tokens to track them.
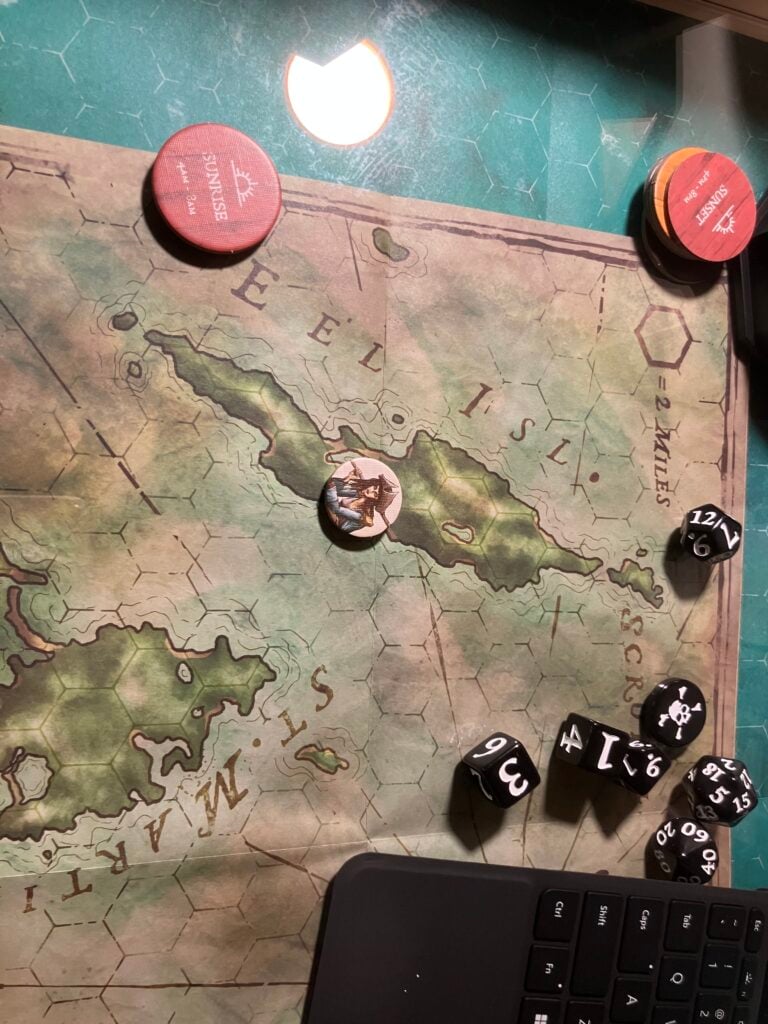
But using this rigorous method of hexcrawling is optional. If you want to track the hours and make a camp at night and post a watch, then these tools are here for you to use.
You don’t even need to hexcrawl at all, as the guidebook explains, you can just go from point of interest to point of interest if you want and skip the crawling.
As mentioned earlier, I’ve watched some YouTubers do the hexcrawls, and they insist that tracking information is more engaging than just rushing from plot point A to plot point B.
So I’ll be proceeding with a hexcrawl, and you just roll on the island’s encounter table each time you move to a different hex.
I did start in the middle of the island, which is where the book recommends. I decided to head south.
Like I mentioned above, there are certain points of interest on this island that are given in the book. I’m going to keep those points of interest but change their locations, just in my head, and then I’ll roll a D4 to see which one it is when I get there.
So I have it it my head that there is something on the southernmost tip of the island. There is a lot of jungle between the party and there.
The first roll is a six. No encounter.
I don’t need to replay the entire crawl to the southernmost point, just know that they arrive during the afternoon watch after defeating a marooned pirate and a lost redcoat and are now twenty-six gold pieces richer.
So what’s at the southernmost tip? Time to roll a D4 and find out.
Shoot. It isn’t the Silent Angel. But it is the next best thing. It’s the high point of the island, and the guidebook says you can see the wreck from your vantage point. So I just decided on which hex it was on.
You can also see a few other things with the naked eye. You can see the Scrub Island Outpost, the coast of the island of St. Martin, the Wharf Rat sailing around the tip of St. Martin towards Gibbet Town, and a sloop moored at the docks of Scrub Island.
Again, I’m going to scramble these locations for the replay, so as not to ruin them, but I’ll use the new information.
Because Felicity rolled up a spyglass at character creation when she rolled for “fancy gear”, we can see a few other things as well.
You can also now see the redcoats’ longboat, which I’ll put on some random hex, the colors flown by any ship within 10 miles (not sure why this is relevant. Maybe later?), volcanic smoke rising in the direction of Pelican Island, and Mr. Oxley laughing aboard the deck of the Wharf Rat with other mutineers.
That makes Felicity mad.
So the next entry I’m going to hexcrawl back up the island to the location of the Silent Angel. I may or may not try to commandeer the redcoat’s longboat on the way, but it sounds like things are moving right along!
Thanks for reading.